Showing posts with label Fork Oil. Show all posts

Sunday, 4 September 2011

Forked Up Forks

Ok I never new forks could give so much drama. Here is hoping all is resolved.

If you have been following you know I rebuilt the forks last weekend.  There was issues with the hack job the previous owner had done on them and they leaked.

Well here is the damage and the repair job.

As you can see there were two nice big grooves cut in the forks.
I used this rag soaked in a little petrol to clean he oil off the top rim then stuffed the  rag into the top of the fork to catch any debris. I moulded some epoxy metal putty into the grooves and let it harden.  I then wrapped the fork cap thread in teflon tape to build it up a bit.  Once hard I got some emery and sanded the putty smooth.  Screwed the cap in down to the O-ring added some silicon, screwed it shut and left it to set.
36hrs later bounced on the forks and no weeping!  Yeah baby!

Swapped all four bolts over in the lower triple clamp after breaking one.  I think the black socket heads look much better. See image to left for comparison with original.

Removed the aluminium chain guard and painted it.
Of course I scratched the sh%t out of it trying to get it back in…..kinda a force fit, with out removing the shock and rear wheel.  So I masked the bike up and gave it a bit of a spray…..you know it, it now has runs in it….


This is my sissy bar concept.  Thinking to have the bar follow the line of the rear hoop.  Tabs coming off to the  shock mounts and rear fender mounts.  May run a flat across the top of the rear hoop if need and use the existing hole to bolt to.
It's about 700mm high and has a nice smaller gauge inner detail.  Thinking to use ½" Rod, and paint it black.
I'm hoping to take the bike to Chopped 2011 and need to take my camping gear, swag and camera gear.


Hoping to take the bike for RWC tomorrow……….Finally! Fingers Crossed.

Monday, 29 August 2011

Weekend Stage 1………...

Hap offered last week to help me get the bike well on it's way to RWC last week. So come Sat morning I was on the road to his place to get wrenching.  It was an interesting  30min or more trip over.  I had no rear brakes what so ever……Obviously i did something wrong or didn't solve the problem when I pulled them all a part the other day!!!  So riding through twisties and hills country in traffic was interesting.

Then on the highway she decided to run out of fuel.  This model has twin petcocks and I am not familiar enough with her yet two be able to switch them both to reserve on the fly.  So a quick down hill rolling navigation across lanes, no indicators to the side of the road.  Back on track over to Hap's house.

Bit of time spent cleaning out the garage and we had space, the bike up on the lift and ready to wrench!
 First thinh to look at which wasn't on the plan was the rear brake……and what else I had stuffed in the process to shread my rear tyre. See Photo further own  Turns out I had made a few mistakes. LIke I hadn't adjusted the chain tension with a loaded weight ie me as the rider, and i had tighened the axle etc  and done everything with the bike on blocks. As a result the axle wasn't tight enough and had moved out of line caused by the chain to pulling the axle forward on that side and the tyre rubbing on the swing arm. :-(   Got all that sorted and my spirits were a bit down but we were back on track with what I was there to work on.


The Assorted bits in preparation.  I went with the 15Wt Fork Oil.

Didn't need to remove the triple trees so didn't end up checking the neck bearings to see if hey were original or taper bearings.  Another day.
My tool which Hap turned into a super tool…..20points to anyone who can figure out all the multi functions 

As you can see the Dust caps are FKD!, the inner tubes are not pitted at all in great condition to look at.   The left had  maybe 50ml of oil the one on the right had none….dry as a dead dingos donger!  

Completely disassembled the forks and cleaned em down, flushed them with petrol. and rebuilt them with new oil seals.  Put 230mls of fresh oil in each. Used the syringe tool I made to adjust and even out levels in each fork. The shed built little bolt tool was invaluable to remove the fork caps.


Dramas of the process.  You can see the damage I did to the tyre on the ride over… Axle had slipped.
The slimeline dust caps were a nice tight seal but wouldn't seat low enough in side the tubes.
The 35mm one go on the outside but looked stupid as they aren't long enough to catch on the groove to hold them on.
So the originals went back on with some cable ties to help keep them together.  Oh and the gators weren't even close to fitting.   Putting the bike back together I managed to snap the lower triple clamp bolt.  It was a issue to remove so. Thought I was going to have to disassemble it and drill it out.
Since it is a throgh hole and not a blind hole. I filed a small slot in the end and screwed it out forwards, rather than attempt to retract it.    Will have to go buy a replacement.


My Wheel.

7pm , This all took long than expected and had to finish getting the wheel on, connect the fender & brakes.    Still hadn't even looked swapping the rear shocks or fitting the Harley mufflers………. I let Hap make the call and I was off home leaving the bike till tomorrow……………….

Thursday, 25 August 2011

FINALLY PREPARED TO DO MY FRONT FORKS...

First issue was how to remove the fork caps.
Solution was to make up this little tool, FYI the bolt needs to fit a 17mm socket to match the fork cap.

These need to be replaced.


Got these Seal and slim Dust seals
Also picked up a set of these 35mm High ones.  I also have a set of gators in the parts box. So I might mix and match see what looks best.
Made up my fork levelling tool.  Got the 60ml syringe from the local Vet Clinic, just had to smile nicely at the nurse…Free.  The PVC hose cost about $4 and the balck pipe is from a sprinkler kit and has a nice joiner perfect size, 49Cents.
Beats buying one for $30…WIN!


Bought a small funnel & measure cup at the local $2 shop, and got some motorcyle specific fork oil a few weeks back ready to go. Didn't want to mess around with motor oil, ATF etc.

I also picked up a set of taper steering bearings just incase I have the old original ball ones. If I am pulling it apart I might as well do it in one go.  Bearings are different sizes so don't mix them up.


  • Upper:  25 x 48 x 15.2
  • Lower:  30 x 48 x 15


Bought a length of allthread and some washers to use as a tool to fit the bearings.
Basically there is a nut and washer below the bottom of the neck and same at top as you tighten the nuts it presses the bearings into the neck.   Simple……..I hope.
You can use the old bearing racers as spacers to fit the new ones in,

Although the earlier models have a shorter neck and shaft the bearings are the same size for all models. So if I don't need them I can still use them on one of the other two later year bikes.

Proper tool vs Allthread


Saturday, 20 August 2011

Took Two of the girls out for a ride today…...

I said I took them for a ride not went for a ride which would have been much more fun!!!


I notice both bikes hav stock tanks but the black tank finishes flush with the mount tab and the gold one sits slightly higher…...


 Next weekend I intend to borrow the mufflers and rear shocks of goldy to put on the lady for roadworthy inspection. I will also fit the new fork seal, do the fork oil and if req put roller taper bearings in the neck.

Need to find some air filters for Goldy, and some front break callipers, a top for the oil reservoir.
Reassemble the head light and fit it along with the speedo & seat.

See how she runs and what else needs doing, swap the mufflers, risers, and rear shocks back on her and take her for reg. Might fit the clip ons??


Then we start the transformations chopping the lady and cafe job on goldy……can't wait!!!


Did a bit of work on some more kicker patterns……..

Start of the Paddle Pop, Ol'Skool Ice Cream Inspired


Added a backing board an sealed the skull, still needs some body filler and a good sand, the primer filler.  Also need to make the back half.


Thursday, 4 August 2011

Boom Boom Goes the DRUM

Need to make up a tool so I can remove these fork caps.  Thinking if I can get a bolt head or nut to fit inside I can adapt it into a tool for the job.  

As you can see the dust covers are totally F'd and need replacing.

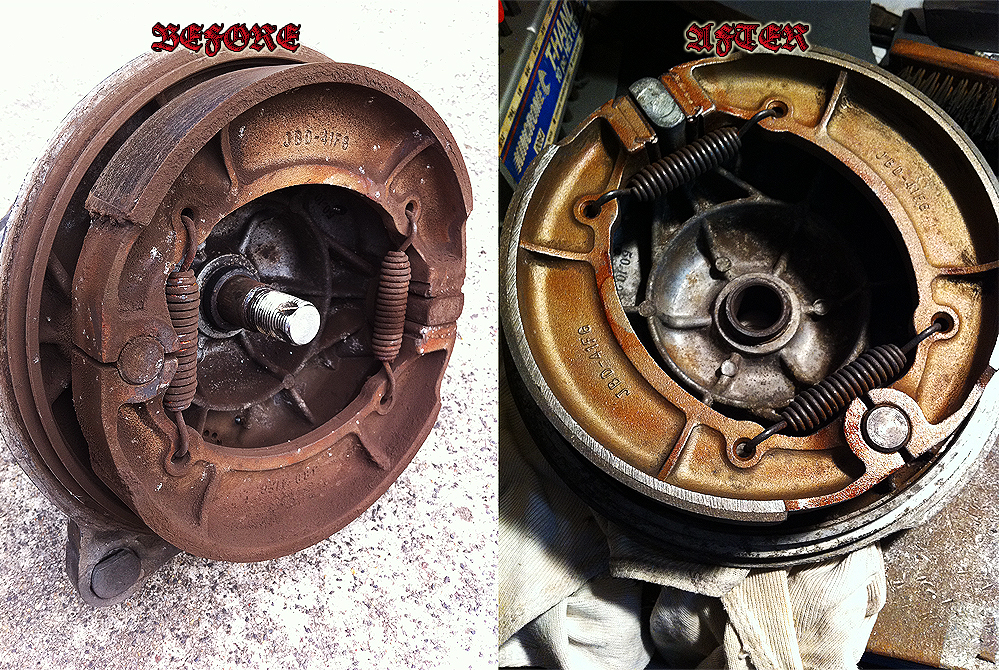
Don't have a centre stand on the bike but managed to get it up on some blocks today and got the rear wheel off.  Cleaned the Brakes. I wonder how long it took to accumulate all that dust?   Roughed the pads a little with some sand paper also.  Looks like plenty of pad to me…...

My super duper polishing rig.  


After a bit of sanding to get the rest of the patches of old paint off. I hit the drill polishing wheel for a bit. Look tons better than it did but with a bigger wheel, stronger cutting compound and a bit more patience  could still go alot further. 


Back together!


The Ol Lady tells me I am not touching her until I get the grease stains of my hands and black out from under the nails…. I guess I might as well go back down the shed then :-)

I can see some mechanics glove being my next B'Day present lol.

Friday, 29 July 2011

To Do or Not To Do……..That certainly is the question!

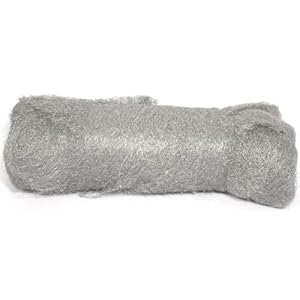
Well pulled the mufflers off and the do have some sort of internal wall which I assume is a baffle of some kind……Still they are too loud to pass so I can easily throw so steel wool in behind the wall and it wont shoot out the pipe with hard acceleration, may still burn up but at least there will be no shooting fire balls………..just hope I don't go up in flames!  Will put em in for RWC and take em out again right after. I like loud pipes……Loud Pipes Save Lives!

As  for the rear wheel it has beaten me temporarily…I don't have a center stand on my bike and I tried to get t up on blocks but that isn't a job for one person, this is a heavy bike man!  I didn't feel like having it fall over either.

To Do List!……..

1.  Need to quiet my pipes down so going to stick some steel wool in them and see what happens with that…..O'Skool baffles man…

Can buy stuff from the bike shop fine Stainless Steel…. I am thinking to go to Coles and see if I can get something cheap an nasty!


2. Rear Brake,  pull the rear wheel off and take a look at the hub brake see if anything has gone a miss and give it a general clean up inside. Then a good clean outside and I think I might polish the brake side cover while I'm at it.

I will also measure up the rear axle to see how it compares with what I will need for the wide rear when the time comes.


3. Front forks need new dust covers, so I am thinking of fitting gaiters instead and will replace the oil in the fork which seem to be dry currently and new fork seals.  Planing on going for a 15wt Fork Oil or ATF no detergents and have ingredients to preserve the seals.  May have a set of seals in the spares box fingers crossed! Even if I do they maybe for the other bikes, the 74 has the narrower 34mm tubes.

Want to get my hands on a 60ml syringe, length of brass or stainless tube and some clear hose and make one of these suckers up for adjusting the fork oil level.


While the front end is of I will polish the down tubes and clean the front wheel as I will have already done the rear wheel.

4. Look into what can be done about the rear shocks and swapping them over.