Showing posts with label Exhaughst xs650. Show all posts

Monday, 29 August 2011

Weekend Stage 2………...

Back over to Hap's place and I finished putting the front end back together……
Took a gander at Hap's TX bitsa see if this helps me figure out the bucket of brakes I got as to what belongs on my other bikes.  
Switched the aluminium dipstick over to this bike for now at least. It needs polishing.  
Made a start on removing the suspension & pipes off the Gold Bike.  As pictured the corrosion on the shaft deems the originals unfit for use on the road.
After lunch Hap had finished his chores and joined me in the Garage. The Koni shocks were missing the eyelet spacers as you can see the hole is much bigger. Tried various things to take the easy way out, like cutting numerous pieces off the end of plastic and rubber tubes. In the end we had it sorted.

There is a difference in length and wind, but they are all shiny and no corrosion!!

My loud mufflers had to come off.  Removed the pipes off the gold bike but could not separate the muffler and header pipe, even with the assistance of WD40 and the BFH... 
Made up some brackets and fitted the Harley pipes.

After all this I took the bike for a test ride and the Left fork cap was weeping….this is the fork that was completely dry.  Out came the fork cap, and in went one from the doner bike….Still weeping.
After removing the cap again we discovered some PO had drilled three grooves down through the threads. I am guessing he had stripped the fork cap nut, and done something creative and damaging to remove it.
Solution was to try a little bit of silicone.  Of course I was eager to get home and out of Hap's hair, I'd taken over his garage for two days straight, and i didn't give it enough time to cure.


Saturday, 20 August 2011

Took Two of the girls out for a ride today…...

I said I took them for a ride not went for a ride which would have been much more fun!!!


I notice both bikes hav stock tanks but the black tank finishes flush with the mount tab and the gold one sits slightly higher…...


 Next weekend I intend to borrow the mufflers and rear shocks of goldy to put on the lady for roadworthy inspection. I will also fit the new fork seal, do the fork oil and if req put roller taper bearings in the neck.

Need to find some air filters for Goldy, and some front break callipers, a top for the oil reservoir.
Reassemble the head light and fit it along with the speedo & seat.

See how she runs and what else needs doing, swap the mufflers, risers, and rear shocks back on her and take her for reg. Might fit the clip ons??


Then we start the transformations chopping the lady and cafe job on goldy……can't wait!!!


Did a bit of work on some more kicker patterns……..

Start of the Paddle Pop, Ol'Skool Ice Cream Inspired


Added a backing board an sealed the skull, still needs some body filler and a good sand, the primer filler.  Also need to make the back half.


Sunday, 7 August 2011

I'M FORKED!!!

74 Fork What I am meant to have but don't!

76 Fork, has a pair of small tabs above axle, I don't have these.


77 Fork Seems to look the same.

So I am working on the Lady which is a 74, As you know I am attempting to servicing the forks.
I have checked and they do measure 34mm in the tubes.

However they don't have the tabs and frontal bake position of the 74, 76 still had 34mm and had tabs to the rear, but again the tabs aren't a match.

The 77 seems to be a match for the tabs but is for a 35mm…….?????????
My Abstract forks…...

Sketch of forks vs 77 Diagram


Little tool I made up to remove the fork caps!


Friday, 29 July 2011

To Do or Not To Do……..That certainly is the question!

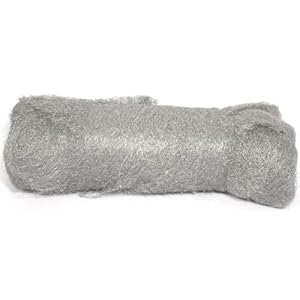
Well pulled the mufflers off and the do have some sort of internal wall which I assume is a baffle of some kind……Still they are too loud to pass so I can easily throw so steel wool in behind the wall and it wont shoot out the pipe with hard acceleration, may still burn up but at least there will be no shooting fire balls………..just hope I don't go up in flames!  Will put em in for RWC and take em out again right after. I like loud pipes……Loud Pipes Save Lives!

As  for the rear wheel it has beaten me temporarily…I don't have a center stand on my bike and I tried to get t up on blocks but that isn't a job for one person, this is a heavy bike man!  I didn't feel like having it fall over either.

To Do List!……..

1.  Need to quiet my pipes down so going to stick some steel wool in them and see what happens with that…..O'Skool baffles man…

Can buy stuff from the bike shop fine Stainless Steel…. I am thinking to go to Coles and see if I can get something cheap an nasty!


2. Rear Brake,  pull the rear wheel off and take a look at the hub brake see if anything has gone a miss and give it a general clean up inside. Then a good clean outside and I think I might polish the brake side cover while I'm at it.

I will also measure up the rear axle to see how it compares with what I will need for the wide rear when the time comes.


3. Front forks need new dust covers, so I am thinking of fitting gaiters instead and will replace the oil in the fork which seem to be dry currently and new fork seals.  Planing on going for a 15wt Fork Oil or ATF no detergents and have ingredients to preserve the seals.  May have a set of seals in the spares box fingers crossed! Even if I do they maybe for the other bikes, the 74 has the narrower 34mm tubes.

Want to get my hands on a 60ml syringe, length of brass or stainless tube and some clear hose and make one of these suckers up for adjusting the fork oil level.


While the front end is of I will polish the down tubes and clean the front wheel as I will have already done the rear wheel.

4. Look into what can be done about the rear shocks and swapping them over.

Friday, 8 July 2011

PMA -PMS!

Found a Guy selling the PMA cheapish new, bought it and went a diff route so is now selling it unused. He will hold it for me for 24HRs……Give me time to decide if I actually need it…..Bought it anyway I am sure I will use it….everyone says this and an electric ignition are the essential mods for an XS.   Got my eye on a cheap Boyer Ignition also… Below is a Trouble shooting guide for the charging system.  When I decide I can bare the cold I will go out and give it a try.


Quote:
This is taken from one of Curly's posts, and is one of the best troubleshooting guides we have seen:

1. First charge your battery to at least 12.5-12.7V.

2. Find a really thin feeler gauge like 0.010" or 0.015" and hold it pointed down about a half inch away from your generator cover on the engine. Now turn the key on. If your regulator and rotor are working the feeler gauge should slap the case when the magnetic field is created in the rotor. If nothing happens or the magnetic effect seems really weak then go on to the next test.

3. On the solid state regulator models all you need to do is locate the green wire at the regulator plug and make a jump from it to ground. That bypasses the regulator and allows full battery current to flow through the brushes out of the rotor through the green wire to ground. That causes the rotor to make a stronger magnetic field which in turn causes more current to flow in the stator. If your battery terminal charge voltage jumps up to 14.5VDC when you rev the engine then the regulator or the ground connection for the regulator is your problem.

4. If nothing changes then it's time to check the voltage on the brown wire (It may be black on your bike) at the positive brush with the key on. It should be very close to battery voltage. The brown wire that feeds the brush gets its power from the brown wire at the keyswitch. Check the voltage at the three wire keyswitch connector while it's plugged in by probing from the backside of the connector with the key on. Again you should see the same voltage as the battery. If you do get full battery voltage there then repair the brown wire circuit between the switch and the positive brush. If not then the switch is either bad or the red wire from the battery is not passing the full current like it should. If that's the case then keep going back along the red wire, through the main fuse until you find the source of the voltage drop. No more than 0.3 VDC drop is acceptable.

5. Once you have full voltage to the positive brush re-check the charging voltage to see if you're getting 14.5 VDC or better at the battery when revved to about 3,000 rpm. If you still don't have a charge then do the feeler gauge test again. If it slaps the case your rotor and regulator are working and you can go on to stator checks. If not then pull the brushes out of their holder and use an ohm meter to test the rotor. Measure the rotor first by touching the tester leads to the brass slip rings. Then take one lead and touch anywhere on the engine that's not painted. For the first test you should see between 5 and 5.5 ohms between the slip rings. On the second test between one slip ring and the engine you should see infinity on the meter. Any reading lower than 5 ohms on the first test or less than infinity on the second test means you have a bad rotor. Replace it. If it tests good then go on to the stator checks.

6. At the stator wire connector locate the three white wires. Use a voltmeter set on the AC scale to test the three possible connections between the white wires by probing from the backside of the connector. (The connector should be plugged togeter for this test) With the engine running at idle you should see about 10.5 to 11 AC volts (Not DC) on each of the three combinations of white to white that you make. If you get a very low reading on one or two legs then something is grounding your stator. If you have high readings on any of the legs (i.e. 16-18VDC) then your rectifier is bad.

7. If you got low readings on any of the stator voltage checks then unplug the connector and use your ohm meter to check the stator windings. Check the resistance between the three fabric covered wires (stator side) on the side of the connector. On each white to white connection you should read about 0.4 to 0.5 Ohms. If you get a very low reading on all of the three combinations find the single Yellow wire connector and disconnect it. Re-check your stator resistance. If the readings are now good then the yellow wire or safety relay are shorted. If there is one or more that still read low after disconnecting the yellow then check those legs by touching one lead to ground with the other on the white wire. You should see a very high Kilo ohm or infinite reading. If you get a low resistance check the stator lead pigtail to see if it is pinched by the cases or rubbed through on the frame. If that looks ok then your stator is shorted and needs to be replaced.

And that's about it except to say that dirty connections and worn brushes account for most of the charging system problems. Good Luck you'll find the problem. 


I have also been researching the best and most common way to kick start the bike.   Mine won't kick cold even if I jump on it 20 times.  Will kick first go hot though….
Was told there are three things working against you when it's cold. The oil is thicker so the kick isn't as fast, the gas doesn't vaporize as well, and you have finding the best position of the choke to contend with. When it's warmed up already, all three are negated.


So it seems the preferred method it to choke the bike, give the bike two prep kicks (primes the combustion chamber), then turn on the ignition and give it a kick. If it stalls repeat until it runs.  Some people give the throttle a half or full turn some don't…….


Also the carbs being properly tuned and the clutch correctly adjusted can play a part…..Also the bike won't kick with a flat battery!


So I have some testing to do to see if I can get it to kick cold.  Trial & Error baby!


Here is some other info on starting:


If your engine won't start with the starter motor, it means you have a problem area somewhere:
1) starter motor worn out (brushes)
2) battery too small (less tha 14 amp/hr)
3) charging system not charging battery fully


Currently I am going with the concept Battery is too small (Low on Charge)…..


FRAME MODS


I was told Blue Collar Customs, and Mischief Makers (Craig) may also be possible candidates today. 
Can't find Blue Collar Customs in Brunswick…….There was on in QLD that closed down…..


Located Mischief Makers after a lot of searching and have been in brief contact. He seems willing to help out.


I have been informed on Kustom Deluxe:

 The go-to-guy for frame mods in Melbourne is Dale Gilbert.
I spoke to Dale today. He and his brother build mainly racing frames from scratch but are happy to look at modifying or adding a rigid rear end to a frame or doing a rake and stretch
Importantly, they have a frame jig.  Dales number is 9317 9888 I havent had anything done by him, but he came highly recommended. Dale is in Maidstone.

I did put a call through to Steve Martin but he hasn't got back to me yet.
Steve martin, if he ever resurfaces, is the son of Bob Martin (Engineering). Steve was forced to shut up shop after the gubmint legislated him out of business. He did my frame mods when he was working for JAT Choppers, but JAT packed up and moved to NSW.

Steve comes highly recommended but if it was the guy I heard about his Father was the engineer and once he died they were forced to close down shop as no one was ticketed to oversee the work regardless of how competent they were.
If you know of anybody else that can be recommended, list them here.


Monday, 9 May 2011

Hidden Surprises…….

Got a few surprises in the post the other day!


Two boxes from different places.
 in USA.


 Was expecting the Ducati Tank, which was new old stock. However I wasn't expecting it to come with some nice Italian grips, A spark plug, Battery box rubber, Engine mounts, chrome exhaughst  strut, fender strut, few bolts etc.

 My Yamaha/Harley adapter sprocket
 The custom pipes I designed and made for me by the amazing Scott at Gordon Scott Engineering.  See my links!