This morning I headed out in search of some fist aid for the bike.
I picked up two sets of 4x Bolts to replace the sets I broke one of yesterday. Since I am not running with the chromed cover over the lower triple, I went with socket head bolts as I think they will look a bit more finished.
Got myself some metal epoxy putty to see if I can repair the top of the fork inners just enough for the O-ring to seat and seal the fork cap.
While I was there got myself a set of 5 spanners for $4, and a small flap wheel to clean the welds on the custom pipes I had Scott make up for the bobber. Came across a cool little disc with a incremented tapering edge, used to measure spark plug gaps…$0.75. I grabbed two will give one to Hap.
So it will be Wednesday at least before I can look at the trying the putty on the bike and I'm thinking getting it inspected this week is now looking slim.

Monday, 29 August 2011
Weekend Stage 2………...
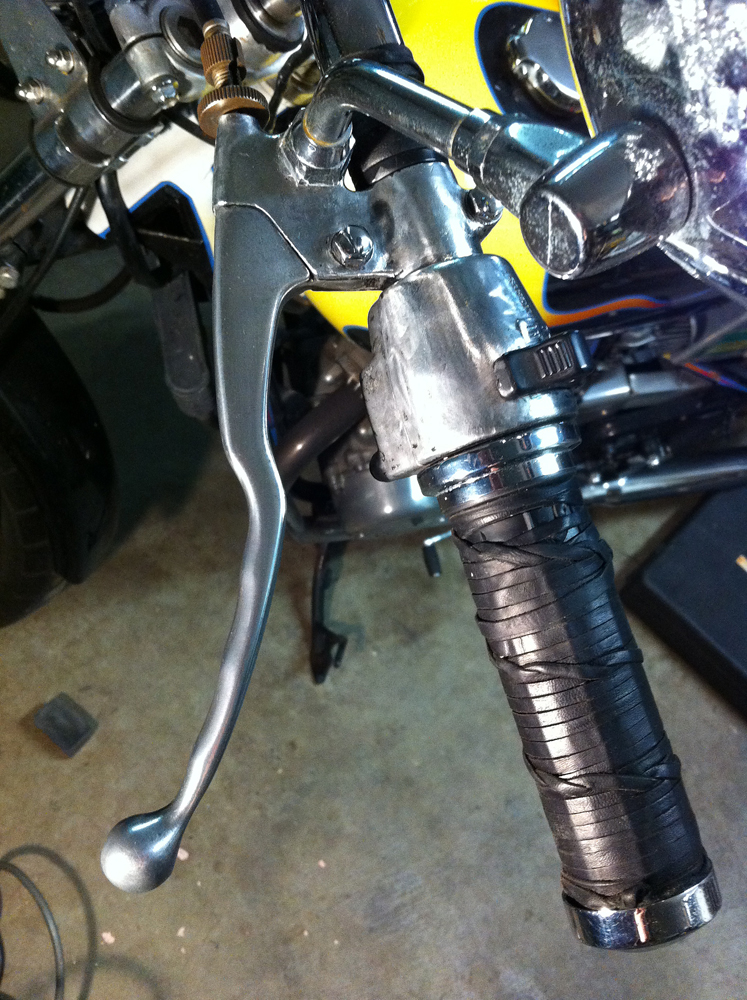
Back over to Hap's place and I finished putting the front end back together……
After all this I took the bike for a test ride and the Left fork cap was weeping….this is the fork that was completely dry. Out came the fork cap, and in went one from the doner bike….Still weeping.
After removing the cap again we discovered some PO had drilled three grooves down through the threads. I am guessing he had stripped the fork cap nut, and done something creative and damaging to remove it.
Solution was to try a little bit of silicone. Of course I was eager to get home and out of Hap's hair, I'd taken over his garage for two days straight, and i didn't give it enough time to cure.
 |
| Took a gander at Hap's TX bitsa see if this helps me figure out the bucket of brakes I got as to what belongs on my other bikes. |
 |
| Switched the aluminium dipstick over to this bike for now at least. It needs polishing. |
 |
| Made a start on removing the suspension & pipes off the Gold Bike. As pictured the corrosion on the shaft deems the originals unfit for use on the road. After lunch Hap had finished his chores and joined me in the Garage. The Koni shocks were missing the eyelet spacers as you can see the hole is much bigger. Tried various things to take the easy way out, like cutting numerous pieces off the end of plastic and rubber tubes. In the end we had it sorted. |
 |
| There is a difference in length and wind, but they are all shiny and no corrosion!! |
 |
| My loud mufflers had to come off. Removed the pipes off the gold bike but could not separate the muffler and header pipe, even with the assistance of WD40 and the BFH... |
 |
| Made up some brackets and fitted the Harley pipes. |
After removing the cap again we discovered some PO had drilled three grooves down through the threads. I am guessing he had stripped the fork cap nut, and done something creative and damaging to remove it.
Solution was to try a little bit of silicone. Of course I was eager to get home and out of Hap's hair, I'd taken over his garage for two days straight, and i didn't give it enough time to cure.
Weekend Stage 1………...
Hap offered last week to help me get the bike well on it's way to RWC last week. So come Sat morning I was on the road to his place to get wrenching. It was an interesting 30min or more trip over. I had no rear brakes what so ever……Obviously i did something wrong or didn't solve the problem when I pulled them all a part the other day!!! So riding through twisties and hills country in traffic was interesting.
Then on the highway she decided to run out of fuel. This model has twin petcocks and I am not familiar enough with her yet two be able to switch them both to reserve on the fly. So a quick down hill rolling navigation across lanes, no indicators to the side of the road. Back on track over to Hap's house.
Bit of time spent cleaning out the garage and we had space, the bike up on the lift and ready to wrench!
First thinh to look at which wasn't on the plan was the rear brake……and what else I had stuffed in the process to shread my rear tyre. See Photo further own Turns out I had made a few mistakes. LIke I hadn't adjusted the chain tension with a loaded weight ie me as the rider, and i had tighened the axle etc and done everything with the bike on blocks. As a result the axle wasn't tight enough and had moved out of line caused by the chain to pulling the axle forward on that side and the tyre rubbing on the swing arm. :-( Got all that sorted and my spirits were a bit down but we were back on track with what I was there to work on.
First thinh to look at which wasn't on the plan was the rear brake……and what else I had stuffed in the process to shread my rear tyre. See Photo further own Turns out I had made a few mistakes. LIke I hadn't adjusted the chain tension with a loaded weight ie me as the rider, and i had tighened the axle etc and done everything with the bike on blocks. As a result the axle wasn't tight enough and had moved out of line caused by the chain to pulling the axle forward on that side and the tyre rubbing on the swing arm. :-( Got all that sorted and my spirits were a bit down but we were back on track with what I was there to work on.
 |
| The Assorted bits in preparation. I went with the 15Wt Fork Oil. Didn't need to remove the triple trees so didn't end up checking the neck bearings to see if hey were original or taper bearings. Another day. |
 |
| My tool which Hap turned into a super tool…..20points to anyone who can figure out all the multi functions |
 |
| As you can see the Dust caps are FKD!, the inner tubes are not pitted at all in great condition to look at. The left had maybe 50ml of oil the one on the right had none….dry as a dead dingos donger! Completely disassembled the forks and cleaned em down, flushed them with petrol. and rebuilt them with new oil seals. Put 230mls of fresh oil in each. Used the syringe tool I made to adjust and even out levels in each fork. The shed built little bolt tool was invaluable to remove the fork caps.   |
 |
| Dramas of the process. You can see the damage I did to the tyre on the ride over… Axle had slipped. The slimeline dust caps were a nice tight seal but wouldn't seat low enough in side the tubes. The 35mm one go on the outside but looked stupid as they aren't long enough to catch on the groove to hold them on. So the originals went back on with some cable ties to help keep them together. Oh and the gators weren't even close to fitting. Putting the bike back together I managed to snap the lower triple clamp bolt. It was a issue to remove so. Thought I was going to have to disassemble it and drill it out. Since it is a throgh hole and not a blind hole. I filed a small slot in the end and screwed it out forwards, rather than attempt to retract it. Will have to go buy a replacement. |
 |
| My Wheel. |
 |
| 7pm , This all took long than expected and had to finish getting the wheel on, connect the fender & brakes. Still hadn't even looked swapping the rear shocks or fitting the Harley mufflers………. I let Hap make the call and I was off home leaving the bike till tomorrow………………. |
Pinched
 |
| Pinched this from a mates blog……Pretty F-N Kewl! He pinched it from Church of Choppers…….Who…..well I dunno where they got it…….. |
Saturday, 27 August 2011

Friday, 26 August 2011


The Troubble with Buttons

 |
| Went to start the kick and it wouldn't kick so I decided to use the Elect start but it seemed to be missing???????? |
 |
| Seems the nut have vibrated loose and the button fallen inside. Has a spring washer on it now . Hopefully that won't happen again. |
 |
| Took to the controls with a small wire wheel on the dremel seemed to work ok |
 |
| After a bit ok work |
 |
| Turns out the controls aren't original, not even the right species! |
 |
| Discovered there were some markings and a switch missing that had been filled in with bog and painted over. |

Updates
My Pinstriping brushes arrived today….kool!
Need to get some paint and start learning to run lines.
Now trying to arrange for the big chop!
Need a few tabs to be fitted for seat hinge & springs, and fender mounts.
Need to get some paint and start learning to run lines.
Now trying to arrange for the big chop!
 |
| As She stands... |
 |
| Need to add this |
 |
| To get this to go... |
 |
| Where I want to be... |
I would also be interested in raking the neck out to 35Deg from stock 27Deg. Would it be cheaper to make a new front & add the tail to make a complete new frame? I don't want the frame to look like it has been altered.
Along with tyres, I still need to sort out brakes, forward controls, fender strut/sissy bar, elec box, seat fittings. Yeah not much! Although it is a bit hard to start until I have the frame to fit too.
Along with tyres, I still need to sort out brakes, forward controls, fender strut/sissy bar, elec box, seat fittings. Yeah not much! Although it is a bit hard to start until I have the frame to fit too.
MY RIMS
APPLICATION | Bearing Type | Axle | Rim Size | 60 SPOKE CHROME |
REAR Wide Tire 5.50” Custom | Tapered | 3/4” | 18x5.50 | 36-736 |
FRONT 21” FXST/FXDWG (Except FXSTS) Single Disc 84/99 | Tapered | 3/4” | 21x2.15 | 36-746 |

Thursday, 25 August 2011
FINALLY PREPARED TO DO MY FRONT FORKS...
 |
| First issue was how to remove the fork caps. |
|
| Solution was to make up this little tool, FYI the bolt needs to fit a 17mm socket to match the fork cap. |
 |
| These need to be replaced. |
 |
| Got these Seal and slim Dust seals |
 |
| Also picked up a set of these 35mm High ones. I also have a set of gators in the parts box. So I might mix and match see what looks best. |
|
| Made up my fork levelling tool. Got the 60ml syringe from the local Vet Clinic, just had to smile nicely at the nurse…Free. The PVC hose cost about $4 and the balck pipe is from a sprinkler kit and has a nice joiner perfect size, 49Cents. Beats buying one for $30…WIN! Bought a small funnel & measure cup at the local $2 shop, and got some motorcyle specific fork oil a few weeks back ready to go. Didn't want to mess around with motor oil, ATF etc. |
 |
I also picked up a set of taper steering bearings just incase I have the old original ball ones. If I am pulling it apart I might as well do it in one go. Bearings are different sizes so don't mix them up.
Bought a length of allthread and some washers to use as a tool to fit the bearings. Basically there is a nut and washer below the bottom of the neck and same at top as you tighten the nuts it presses the bearings into the neck. Simple……..I hope. You can use the old bearing racers as spacers to fit the new ones in, Although the earlier models have a shorter neck and shaft the bearings are the same size for all models. So if I don't need them I can still use them on one of the other two later year bikes. Proper tool vs Allthread  |
Monday, 22 August 2011
Soulful Sunday Sessions @ St. Kilda
Yesterday was such perfect bike weather that I was dying to go for a ride. Really inspired me to get moving on the builds so I can take advantage before we hit the other extreme and it get too hot.
Had to make do with going for a drive with the lil lady down to St. Kilda to have lunch.
Not many sports bikes etc, but Harleys were the flavour of the day and they were everywhere en masses.
Most stock or bolt on brigade, again most of them were weekend cowboys all decked out in their brand gear.
However there were a few bikes that stood out and a really cool hot rod which was driven surprisingly by quite a young guy. Enjoyed a good lunch but came home a litle forlorn that I wasn't in on all the two wheel action…… Soon,..Very Soon!
 |
| I wonder how it runs on Tequila? If you look closely this bike had mad Spanish Phrases written all over it. Crime Scene Headlight & Tail light. Crazy detail in the rear fender. Looks like the put a row of vinyl lettering on the fender then layer he paint up over it leaving the 3d effect. Although it is text it kinda looks like crocodile skin from a distance. |

 |
| Pretty stock bike but had some original and quirky details added. I have to antique fire extinguishers similar to this one that I was thinking to work into one of my bikes. Was trying to figure away to get a small fuel bottle inside it. |
 |
| This was my favourite out of the bikes I saw sunday. Hadnd painted pinstriping, tooled seat, the side indent detail to the tank and the recessed speedo, are just sweet. Found out from one of the boys this bike was pin striped by Steve May over @ lizarddesigns.com.au |

Subscribe to:
Posts (Atom)